How to Import WordPress Post Attachments
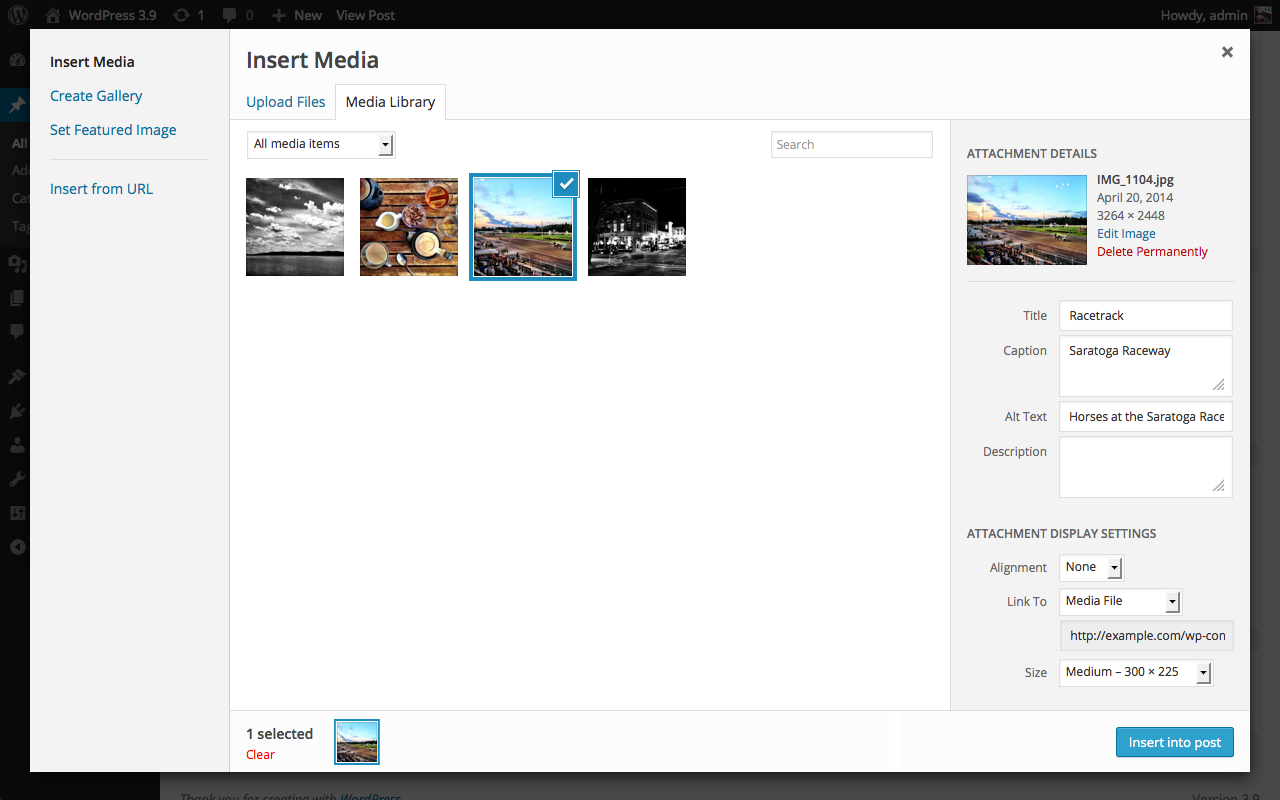
WordPress posts attachments (unlike posts featured images) are often excluded from default WP import/export plugins. Why images don’t get imported is because WordPress’ export function doesn’t include the “attachment” post type unless you select the “All content” export option. But if you only want to import and export your posts from one site to another, you lose your attachments. There is more information about the why of this here.
There are multiple ways you can Import WordPress Post Attachments:
1. Manually importing wp post attachments
For manual, it’s a little more lengthy process, you need to download complete files from one server and upload it to another. Do some changes to the backup DB i.e replacing URLs and then uploading the DB file as well.
2. Using plugin
The other option is to import your posts without the images, and then use the Auto Upload Images plugin to add the images afterward. This plugin does several things:
- It looks for image URLs in your posts (imported posts do still have image URLs in them, but they point to the site the content was exported from);
- It then gets those external images and uploads them to the local WordPress uploads directory and adds the images to the media library;
- And finally, it replaces the old image URLs with new URLs.
The process is semi-automatic and relatively quick. You can uninstall the plugin again when you’re done, so you’re not left with an extra plugin on your website. Using the plugin for this purpose isn’t explicitly documented in the plugin’s documentation, so here is a step-by-step guide.
Step by step: Importing posts and images from one website into another with the WordPress Importer and Auto Upload Images plugin
Step 1: Prepare your export file on the old site
On your old website go to ‘Tools > Export’ and export your posts only.
Step 2: Import your posts to the new site
On your new website go to ‘Tools > Import’ and import the posts you exported. The importer has an option to download and import file attachments, but this won’t work if you’re not migrating all content, so you can ignore this.
Step 3: Install and activate the Auto Upload Images plugin
It installs like any other plugin in the WordPress repository. Once activated the plugin adds a settings page under ‘Settings > Auto Upload Images’, but in my experience, you can leave these to their defaults.
Step 4: Get the image from your old site into your new site
At the time of writing the plugin has no option to automatically go through your posts and bulk upload plus update all the images. Instead, it updates each post individually when you save it. If you have many posts this is a lot of work, but there is a little trick. You can go to your posts overview screen and bulk update your posts. There is a little more information on this here (useful note on multisite).
Essentially, you select multiple posts and then under ‘bulk actions’ choose ‘edit’ and press the ‘apply’ button. Then, without making any adjustments, click the ‘Update’ button. Depending on your server you may get a timeout as the process runs, so it’s a good idea to do this maybe 20 to 50 posts at a time.

Step 5: Check your posts and deactivate/uninstall the plugin
When all is done you can check your posts and confirm they now reference local images. You then no longer need the plugin and you can safely deactivate and delete it.
Final thoughts
Probably a good idea to make a backup of your new site first (at least of your site’s database).
At the time of writing the Auto Upload Images plugin hasn’t been updated for quite some time, but on testing, it worked fine.
With this method, all images in posts get imported, not just featured images.
Recommended Posts
How To Disable WordPress Theme Update Notification (No Plugin)
September 14, 2021
How to Hide Featured Image in Single Post on WordPress
October 8, 2020

How to Track WordPress Site Searches in Google Analytics
October 6, 2020